Collect
following three python scripts from our web page and put them into GNU
Radio directory. Assume that you have gnuradio-3.1.3 installed, you may
want to put them into /gnuradio-3.1.3/gnuradio-examples/python/digital.
- video_tx.py: video packet transmitter which gets packets from ffmpeg.
- video_rx.py: video packet receiver which hands packets to packet transreceiver.
- packet_transreceiver.py: assembles packets that have been split at the transmitter side and sends the assembled packets to ffplay, the video decoder. GNU Radio has a maximum packet size limit of 4096 bytes. Occasionally the encoded packets may exceed this limit (one packet per frame) and we need to split the packets before sending them to GNU Radio.
Receiver and Decoder
1. Assume that your FFplay has been installed under directory ffmpeg-ffplay-x264, go to this directory and use following command to start H.264 decoder:
./ffplay -f h264 -dest_port 12346
This command tells the decoder to listen to socket port number 12346 for incoming packets.
2. Go to directory /gnuradio-3.1.3/gnuradio-examples/python/digital. Use following command to start the packet transreceiver:
./packet_transreceiver.py --receiveport 12345 --sendport 12346
This command tells the transceiver that packets are coming from port 12345 and the assembled packets should be send to port number 12346, which is the port ffplay listens to.
3. Go to directory /gnuradio-3.1.3/gnuradio-examples/python/digital. Use following command to start the packet receiver.
sudo ./video_rx.py -f 910M --port 12345
This command specifies that the carrier frequency is 910MHz and the received packets need to be sent to port 12345, which is the receiving port of packet transreceiver.
Note that in step 2 and 3, we didn't specify the host address. This is because we are running them on the same PC and the default host is the localhost (127.0.0.1). It is possible to send the packets to another PC using option "--host" with the corresponding IP address.
Now we have set up the receiver. It is now waiting for incoming packets.
Encoder and Transmitter
1. Assume that your FFmpeg has been installed under directory ffmpeg-ffplay-x264, go to this directory and use following command to start H.264 encoder:
./ffmpeg -g 100 -f video4linux -b 200k -s cif -r 10 -i /dev/video0 -vcodec libx264 -y -f h264
-dest_ip 127.0.0.1 -dest_port 12347
The
encoder starts and encodes the capture images to CIF resolution H.264
bitstream at 200 kbps with 10 fps. Encoded packets are sent to port
number 12347 of localhost. Same as the receiver side, it is possible to
send the packets to another PC by specifying a different IP address.
2. Go to directory /gnuradio-3.1.3/gnuradio-examples/python/digital. Use following command to start the packet receiver.
sudo ./video_tx.py -f 910M --port 12347
It tells GNU Radio that the carrier frequency is 910MHz and incoming packets are coming from port 12347, which has been specified in step 1.
Now your should be able to start to transmit packets over the air. The receiver PC should be able to pick up the packets and start to decode them. Below we show the screenshot of both transmitter PC and receiver PC. Note that due to some SDL frame buffer issue, the screenshot fails to capture the content of ffplay display window.
![]()
Transmitter PC screenshot
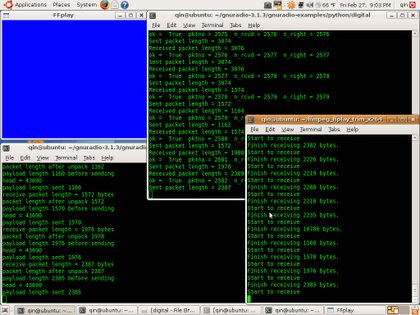
Receiver PC screenshot
Demo Video
